An interesting article regarding snapshots versus art from the Luminous Landscape. I put these things on here, but no one ever comments.....sigh.
Ivan
Wednesday, May 31, 2006
Tuesday, May 30, 2006
April Assignment 2 - Portrait of Sue
What is the photo of/When was the photo taken/Where was the photo taken
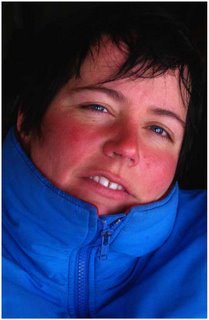
This is a portrait of Sue (aka Dr Budge), taken on Sable Island at East Light in 2003.
Why was the photo taken
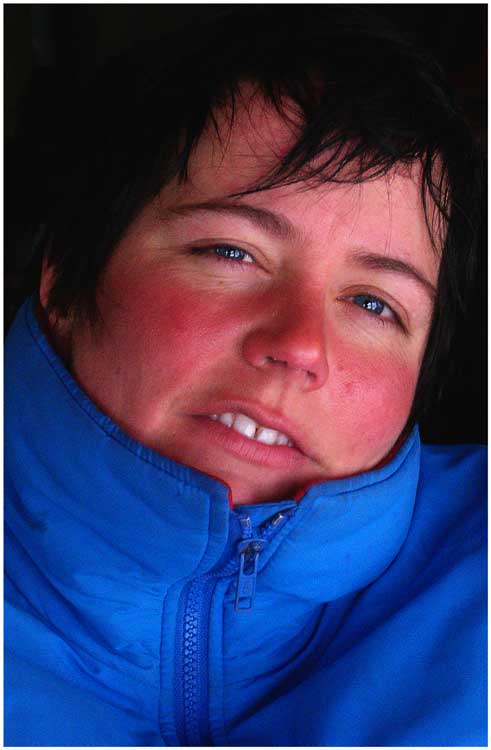
Because I thought the colours were great. Sue had just come in from the outside so her face was quite red from the cold and wind which gave a nice contrast against her blue jacket. The blue jacket also brought out the blue in her eyes. Her hair was dark which again added contrast. She had an interesting expression on her face.
Why was this composition chosen
I wanted a tight composition to focus on the face. The slight angle of the head and the direct stare at the camera, I think, catches the viewer's attention. I also liked the lazy left eye because it enhances the stare.
How was the photo taken
Taken with a Nikon Coolpix 4300, JPEG, sRGB, ISO400, 1/30s at f13.4, with a flash
How was the photo processed
1. I first cropped the photo to remove any background distractions.
2. I then adjusted the levels, added contrast using curves, and boosted the saturation and lightened the image a little.
3. Next I used the Magic Wand to select the jacket and boosted the blue by selecting the Blue Channel in Curves and pulling up the mid-section of the curve.
4. I then inverted the selection and boosted the red in the face using the same procedure but this time selecting the Red Channel.
5. Using the Polygon Lasso Tool I selected the left eye, boosted the blue a little and added some contrast, again using the Blue and the RGB channels in Curves. Opacity was set to 75%. I repeated this for the right eye.
6. Again using the Polygon Lasso Tool, I selected the teeth and using the Blue Channel in Curves I removed some of the yellow by pulling the curve up. Opacity was set to 75%.
7. I then selected the dark background and the hair using the Magic Wand and, using Curves, darkened it so to smooth the transition from the dark background to the dark hair.
7. Finally, I sharpened the image.
8. I added another layer and created a border around the photo. I used the Stroke tool to create a 10px wide white border. This was to add make the photo stand out against the black background of the web page.
Original
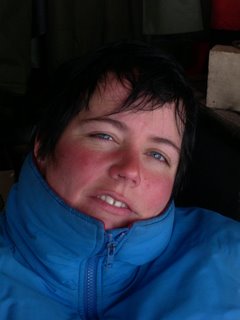
Processed
This is a portrait of Sue (aka Dr Budge), taken on Sable Island at East Light in 2003.
Why was the photo taken
Because I thought the colours were great. Sue had just come in from the outside so her face was quite red from the cold and wind which gave a nice contrast against her blue jacket. The blue jacket also brought out the blue in her eyes. Her hair was dark which again added contrast. She had an interesting expression on her face.
Why was this composition chosen
I wanted a tight composition to focus on the face. The slight angle of the head and the direct stare at the camera, I think, catches the viewer's attention. I also liked the lazy left eye because it enhances the stare.
How was the photo taken
Taken with a Nikon Coolpix 4300, JPEG, sRGB, ISO400, 1/30s at f13.4, with a flash
How was the photo processed
1. I first cropped the photo to remove any background distractions.
2. I then adjusted the levels, added contrast using curves, and boosted the saturation and lightened the image a little.
3. Next I used the Magic Wand to select the jacket and boosted the blue by selecting the Blue Channel in Curves and pulling up the mid-section of the curve.
4. I then inverted the selection and boosted the red in the face using the same procedure but this time selecting the Red Channel.
5. Using the Polygon Lasso Tool I selected the left eye, boosted the blue a little and added some contrast, again using the Blue and the RGB channels in Curves. Opacity was set to 75%. I repeated this for the right eye.
6. Again using the Polygon Lasso Tool, I selected the teeth and using the Blue Channel in Curves I removed some of the yellow by pulling the curve up. Opacity was set to 75%.
7. I then selected the dark background and the hair using the Magic Wand and, using Curves, darkened it so to smooth the transition from the dark background to the dark hair.
7. Finally, I sharpened the image.
8. I added another layer and created a border around the photo. I used the Stroke tool to create a 10px wide white border. This was to add make the photo stand out against the black background of the web page.
Original

Processed
Wednesday, May 17, 2006
Interesting articles on "The Luminous Landscape"
Guys (but especially Damian) - the articles under the "May 13" heading on The Luminous Landscape - and particularly the one about being an artist in business - may be interesting. I thought of Damian when I saw this.
Being an Artist in Business Article
Damo - call us before next Tuesday 23rd to make any final arrangements.
Being an Artist in Business Article
Damo - call us before next Tuesday 23rd to make any final arrangements.
Tuesday, May 16, 2006
April Assignment - Fruit Man
Here is my contribution to the the portrait assignment.
I took the portrait assignment very literaly - I went looking for portraits of people. Pure and simple. Why? Because I have never done this. It forces you to think about the person as well as the image I think. With all due respect - an animal is a different proposition - you can get close or take 20 shots and they will not mind. However, walk up to a stranger who doesn't speak your language and get their permission to shove a point and shoot in their face was a learning experience for me. And one that showed the limitations of point and shoot and also the limitation I felt for original shots, it is very difficult to take a photo with a strangers prior permission without it looking staged...
What is the photo of/When was the photo taken/Where was the photo taken
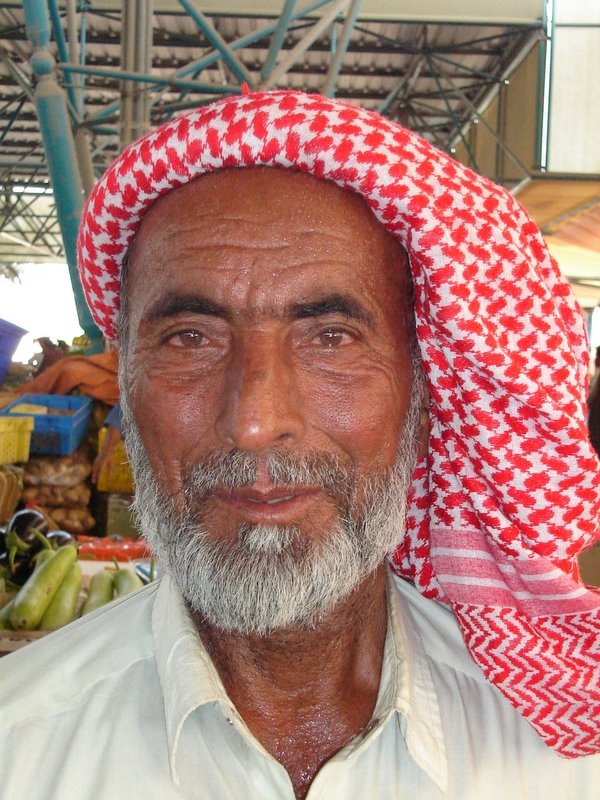
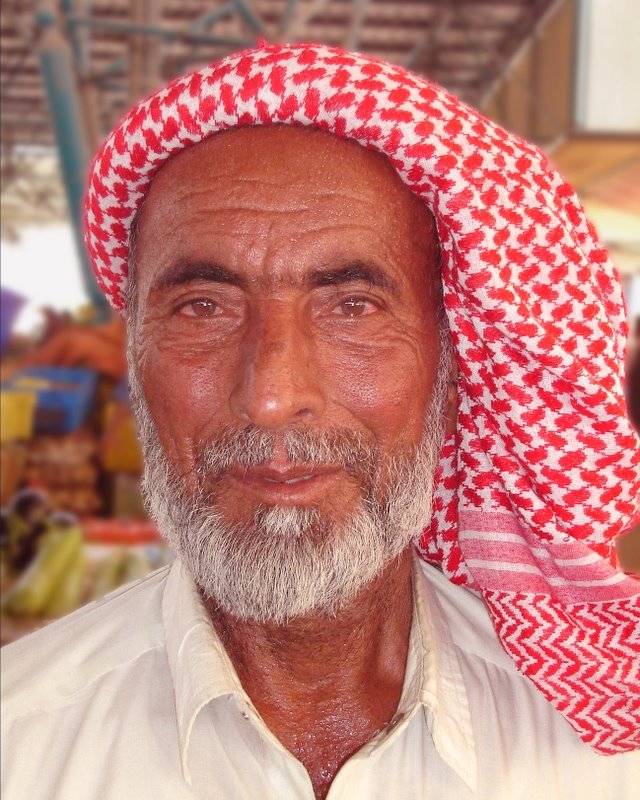
A packer, porter of fruit and veg, Dubai Fruit And Veg Market at Ras Al Khor, April 7th 2006 approx 10.00am.
Why was the photo taken
I was looking for individuals with an expresive and experienced face, one that told some stories. I saw this guy and was taken aback with the stories his face told. Very hot, very tired - making a hard living.
Why was this composition chosen
The original shot was out of necessity. The guy had a huge trolly of produce and was working for probably a few dollars a day. I was this "rich" expat - I just had to take the shot as it was...
How was the photo taken
Sony DSC-S40, 1/200s / f/3.5 / ISO 400 / focal length 9mm
How was the photo processed
Adjusted white balance and colour balance with curves and histogram to identify exact white / black balance. Saturation of the red channel. Decided not to close crop as wanted the entire head dress to remain. However this meant there was a distracting background not adding to the image. Extracted the guy and created a new background layer. Duplicated the extraction several times to sharpen edges and then flattened. The background copy was blurred with gaussian blur to add some definition and depth to the image. Sharpened the guy to bring out the lines and sweat on his face / neck. Slightly lightened his beard and shirt.
Original image:

Processed image:

Grant
I took the portrait assignment very literaly - I went looking for portraits of people. Pure and simple. Why? Because I have never done this. It forces you to think about the person as well as the image I think. With all due respect - an animal is a different proposition - you can get close or take 20 shots and they will not mind. However, walk up to a stranger who doesn't speak your language and get their permission to shove a point and shoot in their face was a learning experience for me. And one that showed the limitations of point and shoot and also the limitation I felt for original shots, it is very difficult to take a photo with a strangers prior permission without it looking staged...
What is the photo of/When was the photo taken/Where was the photo taken
A packer, porter of fruit and veg, Dubai Fruit And Veg Market at Ras Al Khor, April 7th 2006 approx 10.00am.
Why was the photo taken
I was looking for individuals with an expresive and experienced face, one that told some stories. I saw this guy and was taken aback with the stories his face told. Very hot, very tired - making a hard living.
Why was this composition chosen
The original shot was out of necessity. The guy had a huge trolly of produce and was working for probably a few dollars a day. I was this "rich" expat - I just had to take the shot as it was...
How was the photo taken
Sony DSC-S40, 1/200s / f/3.5 / ISO 400 / focal length 9mm
How was the photo processed
Adjusted white balance and colour balance with curves and histogram to identify exact white / black balance. Saturation of the red channel. Decided not to close crop as wanted the entire head dress to remain. However this meant there was a distracting background not adding to the image. Extracted the guy and created a new background layer. Duplicated the extraction several times to sharpen edges and then flattened. The background copy was blurred with gaussian blur to add some definition and depth to the image. Sharpened the guy to bring out the lines and sweat on his face / neck. Slightly lightened his beard and shirt.
Original image:
Processed image:
Grant
Wednesday, May 10, 2006
April Assignment - Seal Portrait
Hello there,
Here is my contribution to the the portrait assignment.
I guess Ivan was right when he thought I would post a seal portrait. I just happened to shoot a lot of seal portraits while on Sable for another project of mine. So here is my contribution.
What is the photo of/When was the photo taken/Where was the photo taken
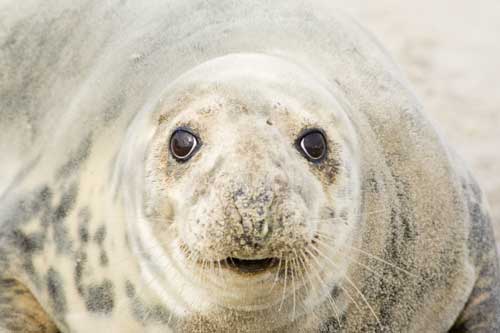
A grey seal female, taken on Sable Island, Nova Scotia on 29 Dec 2005 at 1100am
Why was the photo taken
I was interested in shooting close up of shots of seals. This one looked pretty clean and had an interesting look about her.
Why was this composition chosen
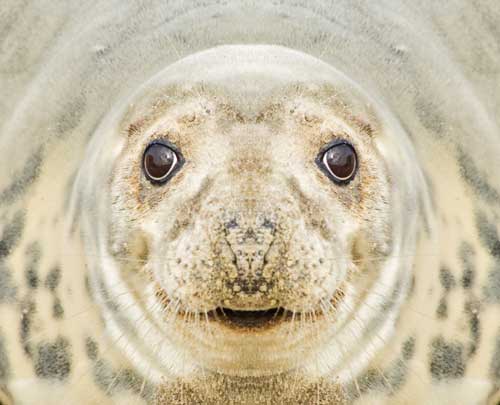
I wanted to fill the image with the seal so I shot very close to her. I waited until she was vocalising at me so that she would look a little more interesting. And I wanted that full-on stare.
How was the photo taken
Canon 350D, EF 100-300mm lens, 1/200th at f8.0, RAW, AdobeRGB, ISO 100, focal length 250mm.
How was the photo processed
I adjusted white balance, exposure/shadows, levels and curves in Camera RAW. I tweaked the levels and curves in PS and added some saturation to bring out the colours, although this female was very light coloured. I then cropped the seal in half vertically and made sure that crop was tight and included only the seal head and a bit of the body. I then duplicated that image, flipped it over and joined that piece to the original crop to create a miror image. I did this because one half was more 'clean' than the other, the crop of the other half was not full of seal, and I wanted to create more of an impact.
Damian
Original

Processed

Here is my contribution to the the portrait assignment.
I guess Ivan was right when he thought I would post a seal portrait. I just happened to shoot a lot of seal portraits while on Sable for another project of mine. So here is my contribution.
What is the photo of/When was the photo taken/Where was the photo taken
A grey seal female, taken on Sable Island, Nova Scotia on 29 Dec 2005 at 1100am
Why was the photo taken
I was interested in shooting close up of shots of seals. This one looked pretty clean and had an interesting look about her.
Why was this composition chosen
I wanted to fill the image with the seal so I shot very close to her. I waited until she was vocalising at me so that she would look a little more interesting. And I wanted that full-on stare.
How was the photo taken
Canon 350D, EF 100-300mm lens, 1/200th at f8.0, RAW, AdobeRGB, ISO 100, focal length 250mm.
How was the photo processed
I adjusted white balance, exposure/shadows, levels and curves in Camera RAW. I tweaked the levels and curves in PS and added some saturation to bring out the colours, although this female was very light coloured. I then cropped the seal in half vertically and made sure that crop was tight and included only the seal head and a bit of the body. I then duplicated that image, flipped it over and joined that piece to the original crop to create a miror image. I did this because one half was more 'clean' than the other, the crop of the other half was not full of seal, and I wanted to create more of an impact.
Damian
Original
Processed
Wednesday, May 03, 2006
April Assignment - Portraits. "Cat"
Chaps,
My first entry into the belated April Portrait Assignment. Now you see why I said it was OK to have animal portraits...I knew I had this image, and was keen to work on it for this assignment. I think it qualifies as a portrait, so no apologies from me. I also knew that D would have some seal shots, and G may have camels...
What is the photo of/ When was the photo taken/ Where was the photo taken
Our next door neighbour’s cat (Jimmy) from our previous rental house in Cambridge. It was taken sometime in Autumn 2005 (October, I think).
Why was the photo taken
I’m not a cat fan (Sorry, G), but this cat won me over. Friendly, affectionate and very cute. He would come round and put his head down on the sill of the open patio door, all cute and expectant. I wanted to get some shots, as we were moving and so was he and his owner. I nearly kidnapped him…
Why was this composition chosen
Like all cats, he chose the composition! He rested his head on the sill of the patio door, and let me get in real close, and fire off lots of shots. I had in mind to do some PS work on it, so I knew I needed lots of shots, to make sure I got just the framing I wanted.
I wanted to crop in tight, and create a really intimate animal portrait, and this was my way of concentrating the attention on the face, the eyes, whiskers etc (more below).
How was the photo taken
I don’t have the camera (EXIF) data to hand, but it was wide aperture, moderate (1/50) shutter speed, lying down on my belly getting close in.
How was the photo processed
I have included the original, so you can see the amount of work that went into the final picture.


I wanted to create the impression of the face coming out of the darkness, so I copied a colour from the black of the cat, and, on a new layer, filled that in with the paintbucket tool. Then, using a blending layer mask, I blended the cat’s face to merge into that shadowy background. I also used various adjustment masks to improve contrast and colour etc, and used some selective masking to bring out the eyes and nose. I also used selective sharpening mask to sharpen the eyes and nose etc to further draw the attention in. I removed some gunk from the left (as you look at it) eye, but should have removed from the right too.
As ever, I await your valued critique.
Cheers
Ivan
My first entry into the belated April Portrait Assignment. Now you see why I said it was OK to have animal portraits...I knew I had this image, and was keen to work on it for this assignment. I think it qualifies as a portrait, so no apologies from me. I also knew that D would have some seal shots, and G may have camels...
What is the photo of/ When was the photo taken/ Where was the photo taken
Our next door neighbour’s cat (Jimmy) from our previous rental house in Cambridge. It was taken sometime in Autumn 2005 (October, I think).
Why was the photo taken
I’m not a cat fan (Sorry, G), but this cat won me over. Friendly, affectionate and very cute. He would come round and put his head down on the sill of the open patio door, all cute and expectant. I wanted to get some shots, as we were moving and so was he and his owner. I nearly kidnapped him…
Why was this composition chosen
Like all cats, he chose the composition! He rested his head on the sill of the patio door, and let me get in real close, and fire off lots of shots. I had in mind to do some PS work on it, so I knew I needed lots of shots, to make sure I got just the framing I wanted.
I wanted to crop in tight, and create a really intimate animal portrait, and this was my way of concentrating the attention on the face, the eyes, whiskers etc (more below).
How was the photo taken
I don’t have the camera (EXIF) data to hand, but it was wide aperture, moderate (1/50) shutter speed, lying down on my belly getting close in.
How was the photo processed
I have included the original, so you can see the amount of work that went into the final picture.
.jpg)
.jpg)
I wanted to create the impression of the face coming out of the darkness, so I copied a colour from the black of the cat, and, on a new layer, filled that in with the paintbucket tool. Then, using a blending layer mask, I blended the cat’s face to merge into that shadowy background. I also used various adjustment masks to improve contrast and colour etc, and used some selective masking to bring out the eyes and nose. I also used selective sharpening mask to sharpen the eyes and nose etc to further draw the attention in. I removed some gunk from the left (as you look at it) eye, but should have removed from the right too.
As ever, I await your valued critique.
Cheers
Ivan
Subscribe to:
Comments (Atom)