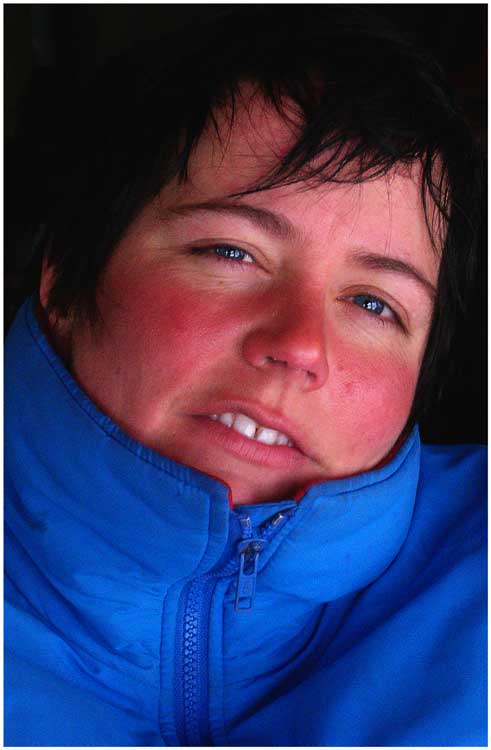
This is a portrait of Sue (aka Dr Budge), taken on Sable Island at East Light in 2003.
Why was the photo taken
Because I thought the colours were great. Sue had just come in from the outside so her face was quite red from the cold and wind which gave a nice contrast against her blue jacket. The blue jacket also brought out the blue in her eyes. Her hair was dark which again added contrast. She had an interesting expression on her face.
Why was this composition chosen
I wanted a tight composition to focus on the face. The slight angle of the head and the direct stare at the camera, I think, catches the viewer's attention. I also liked the lazy left eye because it enhances the stare.
How was the photo taken
Taken with a Nikon Coolpix 4300, JPEG, sRGB, ISO400, 1/30s at f13.4, with a flash
How was the photo processed
1. I first cropped the photo to remove any background distractions.
2. I then adjusted the levels, added contrast using curves, and boosted the saturation and lightened the image a little.
3. Next I used the Magic Wand to select the jacket and boosted the blue by selecting the Blue Channel in Curves and pulling up the mid-section of the curve.
4. I then inverted the selection and boosted the red in the face using the same procedure but this time selecting the Red Channel.
5. Using the Polygon Lasso Tool I selected the left eye, boosted the blue a little and added some contrast, again using the Blue and the RGB channels in Curves. Opacity was set to 75%. I repeated this for the right eye.
6. Again using the Polygon Lasso Tool, I selected the teeth and using the Blue Channel in Curves I removed some of the yellow by pulling the curve up. Opacity was set to 75%.
7. I then selected the dark background and the hair using the Magic Wand and, using Curves, darkened it so to smooth the transition from the dark background to the dark hair.
7. Finally, I sharpened the image.
8. I added another layer and created a border around the photo. I used the Stroke tool to create a 10px wide white border. This was to add make the photo stand out against the black background of the web page.
Original

Processed
2 comments:
Impact - 7. Good eye contact. Close intimate crop. Nice.
Composition - 6.5. Safe but works. Not wow, but competent.
Light/Colour - 7.5. Good use of colour and like the red face blue jacket. Works as a simple colour image. Not wow, but good.
Technical skill - 8. Lots going on here, but the overall effect is subtle, hence well done.
Originality - 7. Head shot, but unglamorous and intimate. Standard stuff, but well done.
Overall - 7.2. Good image. Simple, not wow, but works.
Thanks Ivan. I think they are fair comments. I wanted to try a simple portrait as Grant has done (although he did it in more difficult circumstances) and try out some portrait touching-up skills. I was thinking about removing some of the splotches on the cheeks but preferred to keep them there.
I have one more portrait that I am going to post and that will be me.
Dams
Post a Comment